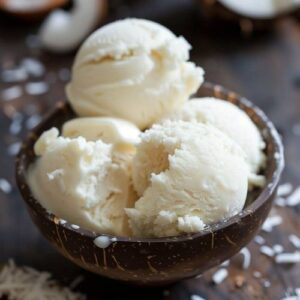
Low-Carb Coconut Ice Cream
A luscious, no-churn coconut ice cream made with just coconut milk, nut butter, and maple syrup. Naturally creamy, plant-based, and low in carbs, this quick freezer-friendly dessert is perfect for satisfying your sweet cravings any day of the week.
Equipment
- 1 loaf pan or freezer-safe container
- 1 high-speed blender or food processor
- 1 Spatula
- 1 Ice Cream Scoop
Ingredients
- 13 ½ oz canned coconut milk chilled
- ¾ cup cashew butter or almond butter
- ¼ cup maple syrup
Instructions
- Prepare Your Freezer Container: Start by selecting a freezer-safe container or a standard loaf pan to hold your ice cream. Place it in the freezer for at least 15–30 minutes before you begin blending. Chilling the container helps the ice cream firm up faster once poured in, reducing the need for repeated stirring and creating a smoother, creamier texture.
- Chill the Coconut Milk: Remove your canned coconut milk from the fridge and ensure it is well chilled.Cold coconut milk helps the ice cream mixture thicken quickly when blended and contributes to a creamy, scoopable consistency. Shake the can lightly before opening to mix any separated cream and liquid.
- Blend Ingredients Thoroughly: In a high-speed blender or food processor, add the chilled coconut milk, your choice of nut butter (cashew or almond), and maple syrup. Begin blending on low speed, gradually increasing to high.Use a spatula to scrape down the sides every 20–30 seconds to ensure all ingredients are fully incorporated. Blend until the mixture is thick, smooth, and creamy, free of any lumps, and has a uniform texture.
- Taste and Adjust Sweetness: Before freezing, taste the blended mixture. If you prefer a sweeter ice cream, add a little more maple syrup or a natural sweetener of your choice. Blend again for a few seconds to combine. This step ensures your ice cream hits the perfect balance of flavor for your palate.
- Transfer Mixture to Freezer Container: Pour the creamy coconut mixture into the pre-chilled freezer container. Spread it evenly with a spatula to create a smooth surface. This helps the ice cream freeze evenly and makes scooping easier once fully frozen.
- Initial Freeze and Stirring Phase: Place the container in the freezer. For the first hour, remove it every 15 minutes and stir the ice cream vigorously with a spatula. This breaks up ice crystals, incorporates air, and ensures a creamy, soft texture rather than a hard, icy block. Continue this step until the mixture begins to firm.
- Complete Freezing: After the initial stirring phase, leave the ice cream undisturbed in the freezer for at least 2–3 additional hours, or until it reaches your desired firmness. The longer it freezes, the firmer the ice cream will become, but even after 3 hours, it should be scoopable and creamy.
- Thaw Slightly Before Serving: About 15 minutes before serving, remove the ice cream from the freezer to allow it to soften slightly. This brief thawing time makes scooping easier and ensures a smooth, luscious texture in every serving.
- Scoop and Serve: Using an ice cream scoop slightly dipped in warm water, scoop your coconut ice cream into bowls or dessert cups. The slight warmth prevents sticking and helps form perfectly round scoops. Serve immediately, or garnish with your favorite toppings such as chopped nuts, fresh berries, or a drizzle of chocolate.
- Optional Ice Cream Maker Method: If using an ice cream maker, follow the same blending steps for the coconut mixture. Freeze for about 45 minutes in a container until slightly firm, then transfer to your ice cream maker. Churn according to the manufacturer’s instructions until thick and creamy. Transfer back to a container and freeze for an additional hour before serving.
Notes
- Ensure the coconut milk is well chilled before blending for a creamier texture.
- Use high-quality nut butter (cashew or almond) for a smooth, rich flavor.
- Maple syrup can be substituted with agave or honey if desired.
- Stirring during the first hour of freezing prevents ice crystals and ensures creaminess.
- For a firmer texture, allow the ice cream to freeze for 4–5 hours or overnight.
- Slightly thaw the ice cream before scooping for perfect portions.
- Optional toppings include fresh fruit, chocolate chips, shredded coconut, or crushed nuts.
